Whether you're creating a beautiful piece of artwork or a functional piece of furniture, staining and painting wood carvings is an important part of the process. This step-by-step guide will provide you with the information you need to achieve the best results for your wood carvings. Staining and painting wood carvings can be a tricky process, but with the right knowledge and techniques you can achieve amazing results. We'll show you how to select the right stains and paints for your project, the best ways to apply them, and how to ensure a long-lasting finish. So, if you're ready to create an amazing piece of art or furniture that will last a lifetime, read on to learn all about staining and painting wood carvings. The first step in staining or painting your wood carving is selecting the right materials. For staining, you'll need a wood stain, a clean rag or brush, and a sealer to protect the wood when you're finished.
For painting, you'll need paint, a brush, and a sealer. Make sure you use a paint that is suitable for outdoor use if your carving will be exposed to the elements. Once you have your materials, you can start staining or painting your carving. For staining, use a rag or brush to apply the stain in long strokes. Make sure to cover all of the wood evenly.
Once you're finished staining, allow it to dry completely before sealing it with a protective sealer. For painting, start by priming your carving with an appropriate primer. This will help the paint adhere to the wood better. Then, use a brush to apply your paint in thin coats, allowing each coat to dry completely before adding another one. Once you've applied all of the coats, seal the painting with a protective sealer. It's important to remember that when staining or painting wood carvings, you should always wear protective gear such as gloves and a mask.
This will help keep you safe while you work. Finally, once you're finished staining or painting your carving, let it dry completely before displaying it. This will help ensure that your work lasts for years to come.
Safety Considerations
When it comes to staining and painting wood carvings, safety should always be a top priority. It's important to wear the right protective gear when working with wood carvings, as the materials used in the process can be hazardous. This includes goggles or safety glasses to protect your eyes from any dust or debris, as well as gloves to keep your hands safe from any potential splinters.It's also a good idea to wear a dust mask to protect yourself from any airborne particles. Make sure you also have a well-ventilated area when working with wood carvings and staining and painting materials. This will help prevent you from inhaling any harmful fumes.
Materials Needed
When it comes to staining and painting wood carvings, there are a few essential materials you'll need. First, you'll need a good quality stain or paint, depending on the desired effect. You should also get some sandpaper, a paintbrush, and a rag or cloth. It's also important to invest in some protective gear such as gloves and a dust mask.These will help keep you safe when using the sandpaper and paint. It's also a good idea to wear an apron or old clothes you don't mind getting stained. Finally, make sure to have a clean workspace. This is important for achieving the best results when staining and painting your wood carvings.
Staining Your Carving
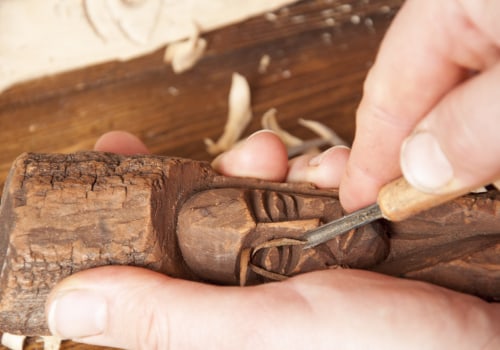
Staining your wood carving is a great way to make it look even more impressive and professional. Before you start, make sure you have the right materials.You'll need a wood stain, a clean cloth, a brush, and a rag.
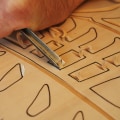
Step 1: Prepare the Wood Carving
Before you start staining, make sure your wood carving is clean and free from dust and dirt. You can use a damp cloth to wipe off the surface and remove any debris.Step 2: Apply the Stain
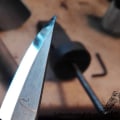
Once the wood carving is clean and dry, you can begin applying the stain.Start by brushing the stain onto the wood in even strokes, making sure to cover all of the surfaces. If you're using a brush, make sure to move it in one direction. Once you've applied the stain, let it sit for a few minutes to allow it to soak in.
Step 3: Wipe Off Excess Stain
After a few minutes, use a rag or cloth to wipe off any excess stain that has not been absorbed.This will help ensure that your carving has an even finish.
Step 4: Allow to Dry
Finally, let your stained wood carving sit for several hours or overnight to allow it to dry completely. Once it's dry, your wood carving will be ready to enjoy.Painting Your Carving
Painting your wood carving is an easy process that can help you take your project to the next level.Before you begin, make sure you've sanded and stained your carving properly. This will ensure that the paint will adhere well to the wood. Once you're ready to get started, here are the steps for painting a wood carving:1.Gather the necessary materials.Before you begin, make sure you have all the materials you need. You'll need primer, paint, brushes, and a sealant. These items are available at most hardware stores.
2.Apply primer to the carving.
Using a brush, apply primer to the wood carving.This will help to protect it from water damage and give it a smooth finish. Make sure to cover all areas of the carving evenly.
3.Paint your carving.
Once the primer has dried, you can begin to paint your wood carving. Use a variety of colors and techniques to achieve the desired look. Be sure to apply multiple coats of paint if needed.4.Apply a sealant.
After your painting is done, apply a sealant.This will help to protect your wood carving from water damage, fading, and scratches. Allow the sealant to dry before handling your carving. Painting your wood carvings is an easy process that can make them look even better. Follow these steps to achieve a beautiful finish on your carvings.
Finishing Touches
When it comes to staining and painting wood carvings, the most important step is to make sure that the carving is completely dry before you start. If you try to stain or paint a carving that still contains moisture, it will cause the stain or paint to bead up and won't adhere properly.The best way to make sure your carving is dry is to let it sit in a well-ventilated area for at least 24 hours. This will ensure that the moisture has had a chance to escape and that the carving is ready for staining or painting. It's also important to note that the wood may shrink or swell slightly as it dries, so you'll want to make sure you adjust your staining and painting techniques accordingly. Staining and painting wood carvings can be a fun and rewarding experience that will last for years to come. With the right materials and techniques, you can give your carvings a beautiful finish that will enhance their appeal.
Be sure to follow the safety considerations for each step, as well as the finishing touches, to ensure that your carvings look their best.


Leave a Comment