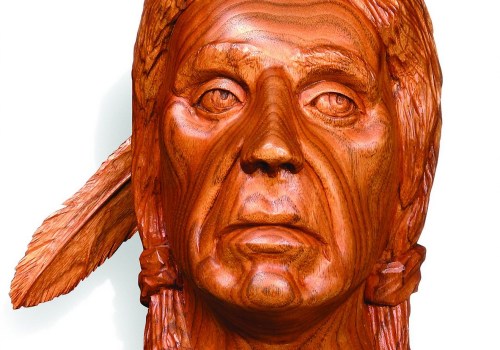
Pyrography, also known as woodburning, is an ancient art form that has been used for centuries to create stunning pieces of art. It's a great way to express your creativity and make something truly unique. Pyrography techniques involve burning designs and patterns into wood, leather, and other materials. These techniques are used to create beautiful works of art that can be kept as home decor or given as gifts. This comprehensive overview will explain the basics of pyrography techniques, from the different tools and supplies you'll need to get started, to the different techniques used to create stunning designs.
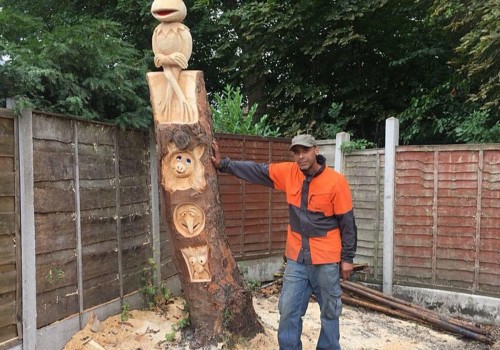
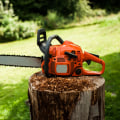
We'll also discuss the different types of material that can be used for pyrography and how to choose the right one for your project. Pyrography is the art of burning designs into wood using a heated implement. This technique can be used to add intricate details and textures to your chainsaw carvings. It’s a great way to give your carvings a unique look and feel. To get started with pyrography, you’ll need a few basic tools and supplies.
These include a wood burning tool, wood burning tips, and protective gear such as safety glasses and gloves. You may also want to invest in a heat gun or blow torch for more precise control over the temperature of the implement. Once you have your supplies, it’s time to start experimenting. There are several different pyrography techniques you can use to create beautiful designs on your carvings. You can use stippling, which is a technique of dotting the wood with a heated implement.
You can also use a combination of lines and shading for a more detailed look. If you want to add color, you can use paint or colored pencils to fill in the design. When creating designs with pyrography, it’s important to keep in mind the type of wood you’re working with. Different woods have different burn characteristics, so it’s important to test out your techniques on scrap wood before trying them on your carving. Another important factor to consider is the heat setting of your wood burning tool.
Different woods require different temperatures, so it’s important to make sure your tool is set to the right temperature before you start burning. Finally, it’s important to practice safety when working with pyrography tools. Make sure you wear protective gear such as safety glasses and gloves when working with the heated implement. Be sure to keep your work area free from flammable materials, and always unplug the tool when not in use.
Pyrography Techniques
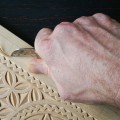
Pyrography techniques encompass a variety of methods for adding texture and detail to wood carvings. Common techniques include stippling, shading, and coloring.Stippling is the process of creating tiny dots of varying sizes and shapes on the wood surface. By carefully placing these dots in various patterns, an artist can create intricate designs and textures.
Shading
is the technique of using a pyrography tool to create darker and lighter areas on the wood surface. This technique is often used to add depth and texture to a design, as well as create a sense of perspective.Coloring is the process of adding color to the wood using pigments or dyes. This technique can be used to add detail and visual interest to a pyrography piece. These techniques can be used in combination with one another to create unique and detailed pieces of art. With practice and patience, anyone can learn the basics of pyrography and begin creating their own works of art.
Safety Tips
When working with pyrography tools, safety should be the top priority.Pyrography tools can generate extremely high temperatures and cause serious burns. Before starting a project, it’s important to read the manufacturer’s instructions and understand proper safety procedures. Here are some essential safety tips for pyrography:
- Wear protective gear. Always wear gloves, safety glasses, and a face mask when working with pyrography tools.
This will protect you from heat, sparks, and flying debris.
- Work in a well-ventilated area. Pyrography tools generate fumes that can be hazardous if inhaled. Make sure the area you’re working in is well-ventilated.
- Keep your tools clean. Make sure to regularly clean your pyrography tools to keep them in good working condition.
This will help prevent clogs and other issues that can arise from dirty tools.
- Be aware of your surroundings. Never work with pyrography tools near flammable materials or open flames. Also, make sure children and animals are kept away from the area.
Heat Settings
Heat settings are an important factor when it comes to pyrography. The heat of your wood burning tool will determine the depth and darkness of the lines you create.Too much heat can cause the wood to char or burn too quickly, while too little heat can make it difficult to create lines and details. It’s important to experiment with different heat settings to find the right balance for your artwork. When selecting a heat setting, it’s important to take into account the type of wood you’re working with. Harder woods such as oak or walnut require more heat than softer woods such as pine or balsa. You may also need to adjust the heat settings depending on the size of the line or detail you’re trying to create. Most wood burning tools have adjustable heat settings, so you can experiment with different settings to see what works best for your project.
When you’re just starting out, start with the lowest setting and gradually increase the heat until you achieve the results you want. It’s also important to remember that different pyrography tips require different temperatures. A small tip may need a lower temperature than a larger tip, so you should check the manufacturer’s instructions for each tip before you start.
Tools and Supplies for Pyrography
Pyrography is an art form that requires a few specific tools and supplies in order to achieve the desired results. The most basic of these tools is a pyrography pen, which is a tool designed to heat up and burn intricate designs into wood.Other important tools include various wood burning tips, a stand to hold the wood, and a ventilation system to protect you from the smoke created by the burning process. In addition, you’ll need some basic supplies such as wood, paper, and a variety of paints and varnishes. The type of pyrography pen you choose is important because it will determine the quality of the results you can achieve. There are two types of pyrography pens - electric and gas.
Electric pens are more affordable and easier to use, but they tend to produce less intricate designs than gas pens. Gas pens are also more expensive, but they provide more control over the burning process. In addition to the pyrography pen, you’ll need various wood burning tips. These tips are designed to create different textures and designs on the wood.
For instance, some tips create fine lines, while others create thicker lines or even deeper grooves. You can also purchase tips that create letters or other shapes. A pyrography stand is an essential tool for keeping your wood in place while you’re working. This stand should be solid and sturdy enough to hold the weight of the wood without wobbling or tipping over.
It should also have adjustable arms so you can adjust the angle of the wood as needed. Finally, it’s important to have a good ventilation system in place when you’re working with pyrography. This will help protect you from the smoke created by the burning process and ensure that your workspace remains safe and comfortable.
Wood Selection
When it comes to pyrography, selecting the right type of wood is essential.The type of wood you choose will influence the amount of detail and texture you can add to your carvings. Different woods also take differently to the burning process, so it’s important to choose a wood that will work with the pyrography tools and techniques you have in mind. Softwoods such as pine, fir, and cedar are popular choices for pyrography. These woods are relatively easy to burn and create intricate patterns. Hardwoods such as oak, mahogany, and walnut may require more skill to burn, but they produce sharper lines and finer detail. When selecting wood for pyrography, it’s also important to consider the grain.
The grain of the wood will affect how the heat from the burning tool is absorbed. Woods with tight or closed grain will absorb less heat, while woods with open grain will absorb more heat. This is important to keep in mind when selecting wood for pyrography. Finally, it’s important to select a wood that is smooth and free of knots or other imperfections. Knots can be difficult to burn around and may create uneven lines in your carving.
It’s best to select wood that is as smooth as possible for the best results. Pyrography is an extremely rewarding and creative art form that can produce stunning works of art. By selecting the right tools and supplies, setting the correct heat settings, and following safety guidelines, you can create amazing pieces of art with unique textures and details. With practice and experimentation, you can hone your skills to become an expert pyrography artist. This comprehensive overview should help you get started on your pyrography journey.

Leave a Comment